

How to Teach a Dog Tricks
The Toy Poodle Is One of the Easiest Breeds to Train
Learning tricks is not only useful — it’s also fun.
The Toy Poodle is one of the most intelligent breeds in the world, and not teaching it anything would be a missed opportunity.
Training together strengthens your bond, helps your dog stay more balanced, and makes everyday life much more engaging.
And besides… you’ll be proud of your dog 😉
Before starting these tricks, we recommend that you’ve already gone through our puppy and everyday life training courses, and that you have a basic understanding of how your dog thinks.

Puppy
Course

Daily
Life Course

Are you ready to start teaching your dog tricks?
Answer these questions and find out if you're ready to begin…
1. When is the best time to train a dog?


2. How long should a training session last?


3. Where does a puppy learn best?



4. Should you walk your dog before training?



5. Is it always necessary to use food?

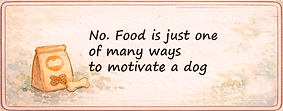
6. If your dog doesn't want a treat during training...



Basic tricks step by step
How to Teach a Dog to Shake Paws?
Giving paw is usually one of the first tricks many dogs learn because it’s easy, looks great, and gives quick results. It also helps the dog understand the basic training dynamic: listen, try an action, and receive a reward. How to teach it step by step: 1. Place the dog in front of you
Start in a calm place, without noise or distractions. Your dog should be focused and willing to participate. 2. Prepare a small reward
Use something your dog really likes and can eat quickly. Ideally, it shouldn’t require much chewing so you don’t break the rhythm. 3. Close the treat in your hand. Show your closed hand at the level of the dog’s nose. Most dogs will first try to sniff, lick, or touch it with their nose.
4. Wait patiently. Don’t give the command yet. Your goal is to wait until the dog, on its own, lifts a paw to try to get the treat. 5. As soon as it touches your hand with the paw, mark and reward. At that exact moment, say a short marker like “Good!” or use your usual cue, and open your hand to give the reward. 6. Repeat several times. Do it a few times so the dog starts to understand which action works. 7. Add the verbal cue. Once the dog begins offering the paw quickly, add the word: “paw”. Say the cue first, present your hand, and reward when it does it.
8. Start showing an empty hand. When the dog understands the exercise, repeat it without hiding food in your hand. Give the reward from your other hand or your pocket. This way, the dog learns to respond to the signal, not just to look for food.

⚠️Common mistakes: Repeating “paw, paw, paw” many times. If you keep repeating the word, the dog stops understanding what it actually means. The cue should be said once. Not waiting long enough. Sometimes the dog needs a few seconds to figure it out.
If you help too quickly, you don’t give it a chance to think. Rewarding too late.
If you give the reward late, the dog may not associate it with lifting the paw, but with something it did afterward. Opening your hand too soon. If the dog gets the treat just by sniffing or pushing with its nose, it won’t have a reason to use its paw.Taking the paw and moving it yourself. This can confuse the dog and make the trick less clear. It’s better if the action comes from the dog. Doing too many repetitions.If the session goes on too long, the dog loses interest and starts performing worse.
Give both paws.
How to teach it::
-
Start from “give paw.”
-
Ask for the other paw.
-
Reward when the dog lifts both paws.
⚠️ Common mistakes:
-
Going too fast without reinforcing the first paw.
-
Confusing the dog with unclear signals.


How to Teach a Dog to Sit?
The “sit” command is one of the most important.
It’s the foundation for many other exercises and helps calm the dog
and manage its behavior..
Objective: The dog should: sit when asked,
hold the position for a few seconds, do it without needing to see food.
How to teach it step by step.
1. Start with the easy version. No TV, no other dogs, no children running around, and no neighbour chatting over the fence. The fewer distractions, the easier it will be for your dog to pay attention. 2. Get a treat... but a small one. There's no need to bring out a steak. The idea is that your dog can eat it in one second and keep training. 3. Raise your hand. Hold the treat in front of your dog's nose and move it upwards and slightly backwards. If everything goes well, the dog's bottom will naturally touch the floor. If your dog jumps to grab the treat... you've raised your hand too high. 4. That's the moment... reward! As soon as your dog sits, praise them and give the treat. Not five seconds later, when they're already thinking about something else. 5. Repeat several times. Dogs learn through repetition, not by divine inspiration. 6. Now give the trick a name. Once your dog sits easily, say "Sit!" just before making the hand movement. 7. Little by little, remove the treat. Eventually, the verbal cue or the hand signal will be enough.
How long should you practise? Five to ten minutes is enough. It's much better to finish while your dog still wants to play... than when they're already yawning and watching pigeons.
Most common mistakes. Repeating the command over and over. "Sit... sit... sit..." In the end, your dog may think the command is "sit-sit-sit." 😄 Pushing your dog down. They're not learning. They're just trying to get away from your hand.
Giving the treat too late. If the reward comes when your dog is already standing up, you're actually rewarding standing up.
Training for too long. Five enthusiastic minutes are worth much more than half an hour of boredom.
Changing the command every day. Today it's "Sit", tomorrow "Sit down", the day after something else... Your dog doesn't have an English dictionary. 😄
How to Teach a Dog to Lie Down?
This is one of the most underestimated commands.
It looks very simple, but when a dog learns to lie down... it also learns to relax.
That becomes incredibly useful while waiting at a cafe, at the veterinary clinic, or when you're talking to someone and don't want your dog greeting everyone who walks past. 😄
"Lie down" is also the foundation for many more advanced exercises.
We don't just want the dog to lie down.
We want the dog to stay calm... even while the world keeps moving around them.
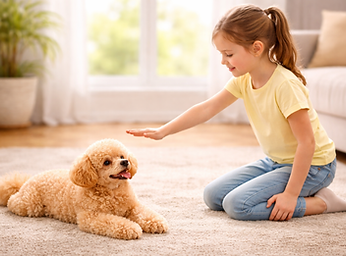
How to teach it step by step.
1. Start from "Sit". You could start from any position... but that would be a bit like learning to run before you can walk. "Sit" makes everything much easier.
2. Grab a treat. It doesn't have to be anything special. It just needs to be tempting enough for your dog to follow your hand.
3. Lower your hand slowly. Move the treat towards the floor and slightly forward. Most dogs will naturally lie down as they follow the movement. If your dog starts chasing your hand all around the room instead... you're moving a little too fast.
4. The moment your dog lies down... reward! That's the perfect moment. Not five seconds later, when they're already thinking about something else.
5. Repeat a few times. Dogs learn by doing. Each successful repetition helps them understand that lying down is a good idea.
6. Now add the command. Once your dog follows the movement confidently, say "Down!" just before lowering your hand.
7. Gradually use less help. First, you'll stop needing the treat. Later, the verbal command or a simple hand signal will be enough.
How long does it take? Usually much less time than people expect.
Just 5 to 10 minutes a day, and most dogs understand the exercise within two or three days. After that, it's simply a matter of practice until the response becomes reliable.
Where do people usually make mistakes? Starting before your dog knows "Sit". It's possible... in the same way it's possible to learn to ride a bike by starting on a steep hill. Moving your hand too quickly. If your dog can't follow the movement, they won't understand what you're asking. Pushing your dog down. We want the dog to choose to lie down. Not to think they've just entered a wrestling match with you. Repeating the command over and over. "Down... Down... Down..." In the end, your dog may think the whole command is "Down-Down-Down." Rewarding too late. If the treat comes after your dog has already stood up again, it becomes much harder for them to understand what they were being rewarded for.
How to Teach a Dog to Crawl?
Some tricks are useful. Others are worth teaching simply because they're so funny.
Watching a Toy Poodle crawl across the floor looking completely serious, as if they're on a top-secret mission, is already worth the effort. But crawling is also a great exercise. Your dog has to coordinate all four legs, control their body, and move forward without standing up. It improves concentration and body awareness, as long as you practise for short sessions on a comfortable surface. We don't want your dog to crawl across the whole living room like a professional commando. A few good steps are more than enough: body close to the floor, calm movements, and no jumping up halfway through.
Want to teach it? Here's how.
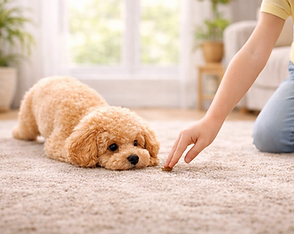
1. Start from "Down". Your dog should be calm and already lying down. If they haven't mastered this command yet, teach it first. Crawling becomes much easier afterwards.
2. Grab a treat. Hold it right in front of your dog's nose. You don't have to wave it around... the moment they smell it, they'll know something interesting is about to happen.
3. Mission starts now. Slowly slide your hand forward, keeping it as close to the floor as possible. Your dog will naturally try to follow the treat without getting up. The official command is usually "Crawl!", but everyone has their own style. Mine have been doing it for years with just one word: "Spy!" 😄 And honestly... it's much more fun.
4. The moment your dog moves forward a little... reward! There's no need to crawl across the whole room. Just a few centimetres without standing up is already a success.
5. Repeat a few times. At first, don't worry about the distance. The goal is simply for your dog to understand the idea.
6. Little by little, your dog will crawl farther. First one step. Then two. Before you know it, you'll have a tiny secret agent crawling across your living room.
7. Always use the same hand signal. Keep your hand close to the floor and move it slowly forward. Dogs learn much faster when your signals are always the same.
How long does it take? This trick is a little more challenging than "Sit" or "Down." Most dogs need several days of practice, spending just five to ten minutes a day. Don't rush it. With this exercise, slow and steady usually gets the best results.

How to Teach a Dog to Stand Still?
It sounds like a very simple command: stand up and do nothing else. But for many dogs, standing still is almost an Olympic sport. The moment you stop moving your hand, they sit down. Wait another second, and they lie down. Wait even longer, and they'll probably wander off to find something more interesting to do. Even so, it's an incredibly useful command.
It makes it much easier to check your dog's paws, brush the coat, put on a harness, dry them after a bath, or present them properly in the show ring. We don't want the dog to stand like a statue. We simply want them to stand when asked, stay calmly on all four paws, and not decide to sit down just when you need to look underneath their belly.
Want to teach it? Here's how.
1. Start from "Sit" or "Down". It's much easier to ask a dog to stand from a clear starting position than to catch them while they're already wandering around.
2. Grab a treat. Hold it right in front of your dog's nose. No magic tricks are needed. If the treat is interesting enough, your dog's nose will do most of the work.
3. Raise your hand slowly. Move it slightly forward and upward. Most dogs will naturally stand up to follow the treat. If your dog starts walking in circles instead... your hand has probably travelled farther than the dog has.
4. The moment your dog stands up... reward! At first, don't expect a perfect show stance. Just celebrate the fact that your dog
understood the exercise.
5. Gradually wait a little longer. First one second. Then two. Then five. Before long, your dog will discover that standing still is worth it too.
6. Now add the command. Once your dog stands up confidently, say "Stand!" just before making the hand movement.
7. Practise in different situations. At home. Outside. Before putting on the harness. While brushing the coat.
The more often your dog sees this command being used in everyday life, the more natural it will become.
How long does it take? This is one of the easiest commands to teach. With just five to ten minutes of practice a day, most dogs understand it within a few days. After that, it's simply a matter of practising until the response becomes almost automatic.
Where do people usually make mistakes? Moving the hand too quickly. Your dog doesn't know whether they're supposed to stand up, jump, or keep walking. Expecting too much too soon. First, your dog learns to stand up. Only then do they learn to stay standing. Repeating "Stand!" over and over again. A command has meaning when you say it once. If you keep repeating it, it eventually becomes background noise.
Rewarding too early. Wait a brief moment until your dog is standing steadily before giving the treat.
A real story. This is probably the command I use most often outdoors. One day I was walking along a country path with several Toy Poodles and a group of children. Suddenly, a pack of cyclists appeared—the kind who seem to think they're racing in the Tour de France and never look to either side. The dogs started running towards the path. There was a real risk that one of them could end up under a bicycle.
I only had time to shout: "Caesar, Stand!" Caesar was a show dog, and this command had become completely automatic for him.
He stopped instantly. The other dogs looked at him... and slowed down as well. That gave me time to calmly give the next command.
The cyclists rode past. The dogs carried on playing. And everyone went home safe and happy. 😄
How to Teach a Dog to Put Its Paws on an Object.
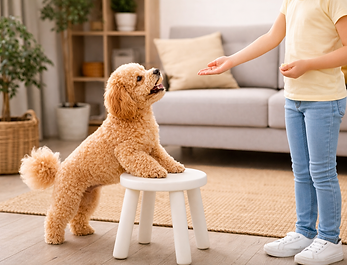
It is not the most spectacular trick in the world. Nobody is going to stop in the street and applaud because your dog has placed its front paws on a stool. But it is one of those simple exercises that later become useful for many other things. It helps the dog understand where its paws are, maintain balance, and work confidently with different objects. It also prepares the way for more interesting tricks: stepping onto platforms, turning around an object, changing position, or learning balance exercises. At first, we are looking for something very simple: the dog places both front paws on a stable object and stays there for a few seconds. There is no need to turn the stool into a stage. For now, it is enough for the dog to understand that its paws can have instructions of their own too. 😄
A quick guide to the easiest trick.
Place a stool between you and your dog. Show your dog a treat and gently pat the top of the stool as an invitation. Your dog probably won't need much time to figure out what you want. 😄 As soon as your dog puts both front paws on the stool, say your command and give the reward. But there's one important rule: walking up to the stool without hearing the command earns no bribes.
And once the paws are on the stool, your dog should stay there for a few seconds. If they jump off straight away... it doesn't count yet. 😄

How do you teach a dog to follow your hand?
This is another very simple exercise. So simple that at first it may seem as if you're not teaching anything special at all: you move your hand, and the dog follows it.
But without this small skill, many more advanced tricks turn into endless negotiations.
Following your hand allows you to guide your dog to turn around, walk between your legs, climb onto an object, or change position. In short, your hand becomes a kind of remote control… although this particular model comes with four paws and a mind of its own. 😄
Our goal is not for the dog to chase your hand because it expects food to be there every time.
We want the dog to learn to watch your hand carefully, follow its movement calmly, and move with you without getting distracted by every sound, smell, or fly passing by.
If you're planning to teach your dog more tricks, teach this one first.
It doesn't look like much. You move your hand... and the dog follows it. "That needs its own exercise?" Yes. Because later on, that same hand will help you teach half your collection of tricks. Turning, weaving through your legs, jumping onto a rock, standing exactly where you want... It all starts here. The funny thing is, your dog can probably do it already. After learning a few tricks, most dogs earn a PhD in spotting a hand that smells like treats. If that hand starts moving in front of their nose, it would be stranger not to follow it. 😄
So you're not really teaching your dog to follow your hand. It already knows how. What you're teaching is something different:
sometimes following that hand is a cue. That's why it's worth adding a signal right from the beginning.
Personally, I wouldn't even use a verbal command. It's much more practical to make a small finger movement before you move your hand.
Later, when you're teaching new tricks, that tiny gesture will be enough.
You won't have to say, "follow... turn... come... up..." like a sports commentator. 😄
So how do you teach it? Easy. Hold a treat in your hand. Place your hand in front of your dog's nose and move it slowly. The moment your dog follows your hand, reward it. Repeat a few times. And before you move your hand, make the same small finger movement every time.
Very soon your dog will understand exactly what it means: "Time to follow the hand."
How do you teach a dog to bow?
This is the perfect trick for a dog that has already learned a few performances...
but still doesn't know how to say goodbye to the audience. 😄
After any trick, it can finish with an elegant bow and accept the applause like a true performer.
And the best part is that we're not teaching anything unnatural.
Dogs already make this pose on their own when they stretch after a nap:
their front legs go down, their chest almost touches the floor,
and their rear end stays up.
All we're doing is convincing the dog that, from now on, this stretch also earns treats.
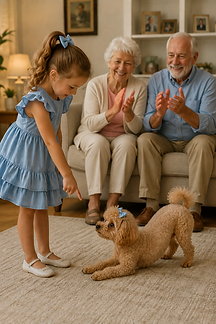
How do you teach it?
Start with your dog standing. Get a treat your dog really loves.
Hold it in front of your dog's nose and slowly lower your hand, bringing it slightly back between the front legs.
Your dog will naturally follow the treat. The hardest part isn't getting the dog to lower its front.
The hardest part is convincing it not to lie all the way down.
Most dogs seem to think, "Well, if we're going down anyway... we might as well finish the job." 😄
If necessary, you can gently place one hand under your dog's belly to stop the back end from dropping.
The moment your dog gives even a little bow... "Good dog!" ...reward it immediately.
Little by little, your dog will understand exactly which position you're looking for.
What about the cue?
Like every trick, this one needs one. You can use "Bow", "Take a bow", or any word you like.
Just make sure you always use the same one, together with the same hand signal.
How long does it take?
Usually, not very long. Most dogs already do half a bow several times a day without even realizing it.
You just have to explain that this stretch now has a name... and that it pays well. 😄
Where do people usually go wrong? Lowering the treat too far, so the dog lies down. Trying to hold the position for too long.
Pushing the dog into position with their hands. Or waiting too long before rewarding the first correct attempt.
And one last thing.
This trick looks especially impressive at the end of a little performance. Sit. Shake hands. Spin. And finish with a graceful bow.
Because a real performer doesn't just know how to entertain... It also knows how to accept the applause. 😄
How do you teach a dog to find a toy?
This is the perfect trick for a dog that knows exactly where you keep the treats... but somehow loses its own toy even when it's right in front of its nose. The idea is simple: you hide a toy, give the command, and your dog has to find it. Start with your dog's favourite toy and let it sniff it well. Then hide it somewhere very easy, even leaving part of it sticking out. Say "Find it!" and encourage your dog to start looking.
The moment it finds the toy... "Good dog!"...reward it immediately. Yes, even if it only took three and a half seconds and the toy was hiding under a chair. At the beginning, we're not testing whether your dog could work for the police. We just want it to understand the game. Once your dog starts searching with enthusiasm, you can hide the toy behind a door, under a blanket or even in another room.
Where do people usually go wrong? Hiding the toy far too well on the very first day. Repeating "Find it! Find it! Find it!" every two seconds. Or helping so much that, in the end, you're the one doing all the searching. Give your dog time. It needs to use its nose, think a little, and discover that finding things
can be a job too.
And one last thing.
Don't be surprised if, after learning this game, your dog finds its favourite ball in seconds...but still can't find the toy it's standing on. 😄
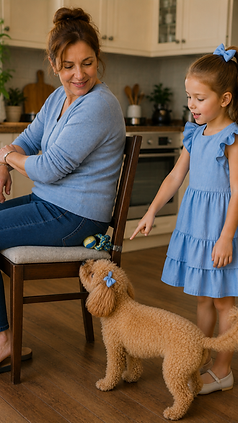
How do you teach a dog to put away its toys?
How do you teach it?
Before you start, your dog should already know how to fetch a toy and happily trade it for a treat. First, play a normal game of fetch.
Throw the toy, your dog brings it back, you swap it for a treat... and repeat. When you notice your dog starting to get a little tired and returning a bit less enthusiastically each time, as if it's decided the salary isn't quite worth the workload anymore... 😄 that's your moment.
Have a box ready. When your dog comes back with the toy, don't take it. Instead, hold the box under its nose. There should already be a treat inside. Now your dog is confused. It can smell the treat. You're not taking the toy. And right then you say: "Tidy up!"
The treat smells far better than the ball. So your dog drops the toy into the box to get the reward.
After a few repetitions, it understands one very simple rule: Toy in the box = treats appear.
Now it's time for the next level. The box is no longer right under your dog's nose. Move it a little farther away each time until it's standing where you eventually want it to stay. Once that's working, try the next step when your dog is hungry. Leave one toy on the floor, point to the box and say: "Tidy up!" Most dogs figure it out surprisingly quickly. As soon as the toy lands in the box...treat...and dinner.
Later, place three toys on the floor. Put the food bowl where your dog can see it, but can't reach it. "Tidy up!" First toy.
Lots of praise...but no food yet. "Tidy up!" Second toy. Even more praise...but the restaurant is still closed. 😄
"Tidy up!" Third toy. Now comes the favourite treat... followed immediately by dinner.
One little tip. If, after putting away the second toy, your dog decides to fetch the third one without waiting for the command...
Bring out the very best treat you've been saving. Your dog has just volunteered to become your cleaning assistant.
That kind of initiative deserves a bonus. 😄
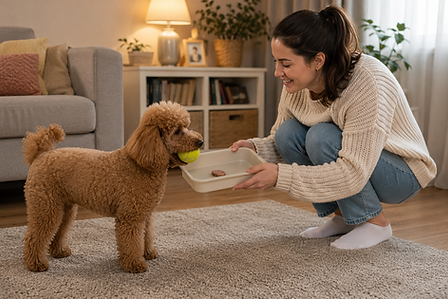

How do you teach a dog to give a high five?
Does your Poodle look at you as if to say, “And what exactly is this supposed to be?” Don’t worry—that’s perfectly normal. Teaching a dog to give a high five is one of those tricks that looks impressive but is actually surprisingly easy once you take it step by step.
Start by asking your dog to give you a paw. As soon as they do, gradually turn your hand upright instead of holding it flat. The moment their paw touches your palm, reward them with a treat and plenty of praise. Two or three short sessions a day will get you much further than one long training marathon that leaves your dog yawning and wondering why their human has suddenly become so strange.
Once your dog understands the movement, add the cue: “High five!” Before long, they'll lift their paw the moment they see your hand—sometimes with the confidence of a seasoned professional, and sometimes with the pure enthusiasm of a puppy who has just discovered that treats definitely don't grow on trees.
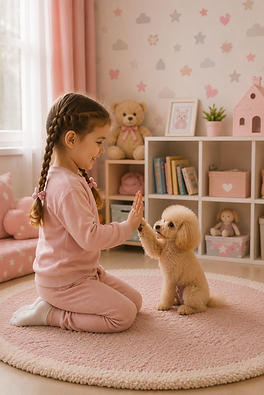
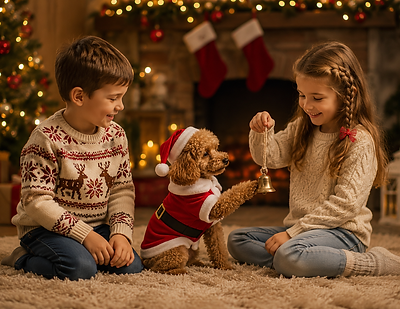
How do you teach a dog to ring a bell?
Want your dog to ring a little bell without waiting for Christmas? It's easier than it looks—and a lot quieter than giving them a drum.
Start by introducing a small bell and reward your dog every time they touch it with their nose or paw, even if it's by accident. Before long, they'll figure out that making the bell ring earns a treat. Once they're doing it confidently, add a cue like “Bell!” or “Ding-dong!”
With a little practice, you'll have a Poodle that can announce visitors, let you know it's time to go outside… or convince the whole family that Santa lives at your house all year round.
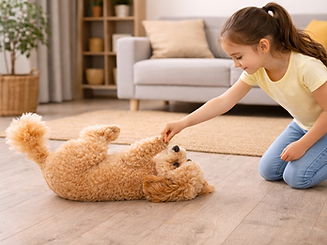
How do you teach a dog to roll over?
This is one of those tricks that is completely useless...
except that it makes everyone laugh. 😄 When a dog flops over, rolls all the way onto the other side, and then looks at you as if to say, "So... what now?", it's impossible not to smile.
And the best part? It doesn't harm your dog at all.
In fact, while learning to roll over, your dog improves its coordination, gains better body control, and becomes more confident with every practice session.
So yes. It's a completely pointless trick...
...which is exactly why every dog should know it. 😄
Want to teach your dog this trick? Here's how.
The only thing your dog should already know is how to lie down on command. After that, it's pretty straightforward. Get a treat your dog actually cares about. There's no need to serve a full dinner, but don't expect a boring piece of kibble to be very convincing either. A small bite of something your dog absolutely loves works much better. Hold the treat in front of your dog's nose and slowly move your hand to one side, toward its shoulder. Your dog will naturally try to follow it. Keep moving your hand until your dog completes the roll.
The moment it rolls all the way over... 👉 "Good dog!" ...and reward it straight away. And don't forget the praise. A cheerful "Good job!" can sometimes be almost as rewarding as the treat itself.
What about the cue? Like every trick, this one needs one. You can use "Roll", "Roll over", or any other word you like.
The important thing is to use the same cue every time.
How long does it take? Usually much less than people expect. It looks like a difficult trick, but most dogs figure it out in just two training sessions of five to ten minutes each.
Where do people usually go wrong? Moving the treat too fast. Rewarding before the dog finishes the roll. Or trying to help by physically pushing the dog over. That usually just makes things more confusing.
And one more thing.
Even if your dog knows this trick perfectly, it may refuse to do it for someone it doesn't trust. And that's completely normal.
From a dog's point of view, showing its belly means becoming completely vulnerable. You don't offer your soft, unprotected tummy to just anyone. So if your dog happily rolls onto its back the moment you ask, it's doing more than performing a trick.
It's also telling you that it trusts you. 😄
How do you teach a dog to swim?
First, here's an uncomfortable truth: not every dog is born knowing how to swim.
Some dogs walk into the water as if they've been training for the Olympics their whole lives.
Others dip one paw in, look at you, and make it perfectly clear that this was your idea, not theirs. 😄
Poodles usually get along well with water, but that doesn't mean you should throw them in and wait for "dolphin mode" to switch on.
The best way is to start somewhere quiet, with shallow water, no waves and as little noise as possible.
Let your dog come closer, sniff the water and get its paws wet at its own pace. It needs to discover that the water isn't trying to eat it.
Then get in yourself. Many dogs become much braver when they see that their human is still alive, hasn't disappeared underwater, and actually seems to be having fun. Call your dog, show a favourite toy, or tempt it with a small treat. No rush. One paw first. Then both.
Then up to the chest. Before it even realizes it, it'll be swimming.
At the beginning you can support your dog gently so it doesn't panic or start paddling like a broken washing machine. 😄
Every little step deserves praise. Yes, even if today all it managed was getting its paws wet.
How long should you practice? Not for long. A few minutes is enough.
It's much better to leave your dog thinking, "That was fun. Let's do it again." ...than "You'll never get me anywhere near that water again."
Where do people usually go wrong? Throwing the dog into the water. Forcing it to go in. Starting in water that's too deep.
Or choosing a day when the water is so cold that even you wouldn't put a toe in. That teaches a dog one thing very quickly:
water is a terrible idea.
And one more important thing.
No matter how well your dog can swim, that doesn't mean it will survive if it falls into a swimming pool while you're not home.
It may become exhausted, panic, or simply be unable to find a way out.
Knowing how to swim doesn't help much if there's nobody there to help it get out. So enjoy the water together.
Don't leave your dog practising synchronized swimming while you're sitting comfortably inside the house. 😄